Hi SpyderChat,
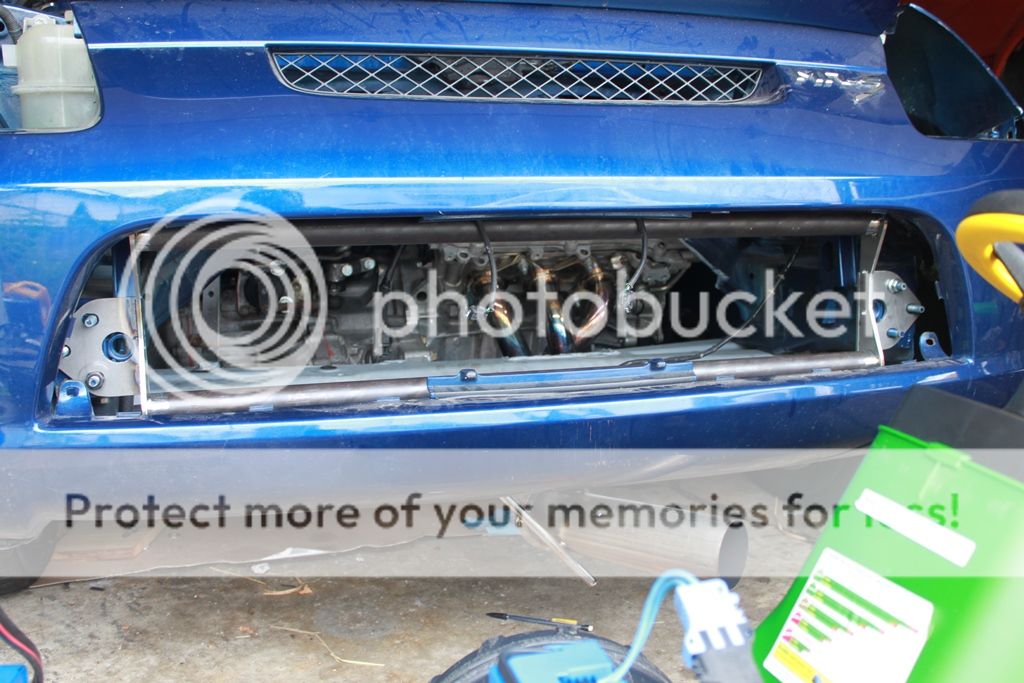
I currently am done with the prototype. If you have been MIA here is the up to date link.
http://www.spyderchat.com/forums/sh...read.php?57970-Who-would-be-interested-in-a-new-rear-end-crash-bar-(pic-inside)
Updated:
Plates are 3/6" and tubing are 0.120" thick. If you want smaller thickness tubing (.109", .083", or .065"), please PM or email.
Looking at $240 shipped in the lower 48 states.
Paypal fueloveskhou@gmail.com
2-3 week turn around.
Thank You,
Fue Xiong

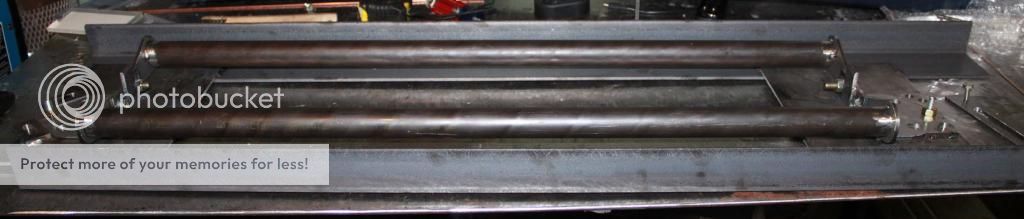
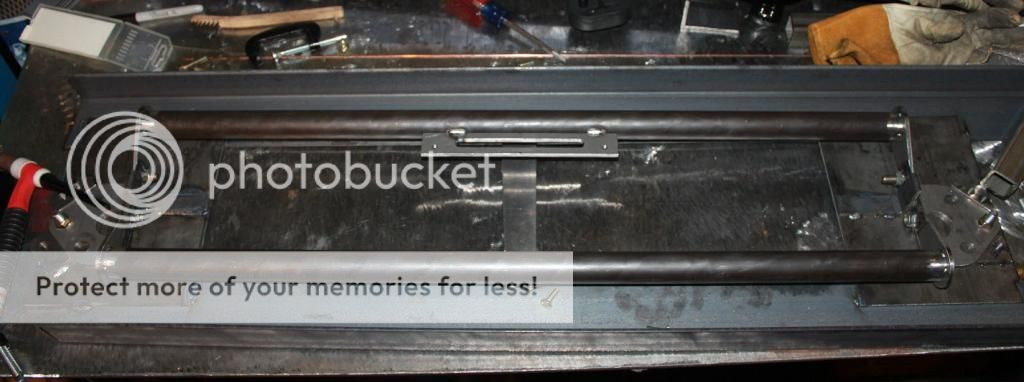
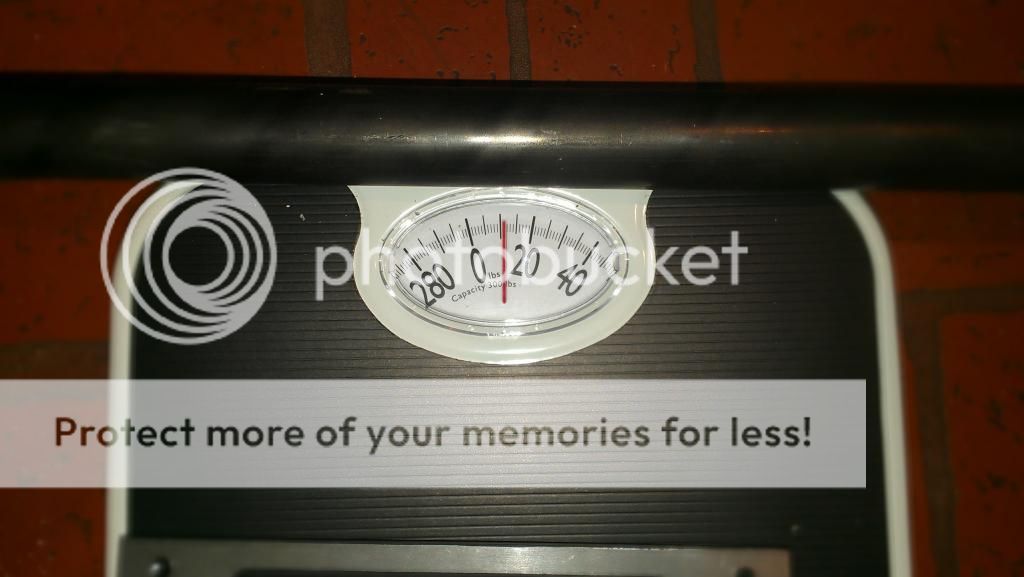
Weight about 1 pd difference.

I currently am done with the prototype. If you have been MIA here is the up to date link.
http://www.spyderchat.com/forums/sh...read.php?57970-Who-would-be-interested-in-a-new-rear-end-crash-bar-(pic-inside)
Updated:
Plates are 3/6" and tubing are 0.120" thick. If you want smaller thickness tubing (.109", .083", or .065"), please PM or email.
Looking at $240 shipped in the lower 48 states.
Paypal fueloveskhou@gmail.com
2-3 week turn around.
Thank You,
Fue Xiong


Weight about 1 pd difference.


 It's in SoCal now. Lol